##RTL语言
- RTL语言即Right-to-left(从右向左)的语言.其书写习惯为从右向左,朝左继续.
- 这里的RTL严格意义上指的是Right-to-left,top-to-bottom 从右向左,从上到下. 而汉语,日语以及朝鲜语中存在Top-to-bottom, right-to-left从上到下,从右向左的情况. 但是这些语言大多数使用从左向右的情况.
- 常见的RTL语言有阿拉伯语,希伯来语等.
- LTR语言和RTL语言刚好相反,即我们常见的Left-to-right,Top-to-bottom,从左向右,从上到下,朝右继续.这种语言很常见, 代表语言为英语等.
- 双向文本( Bi-Directional Text),即RTL文本和LTR文本混合的情况.比较复杂.
##Android对RTL支持情况
- Android 4.1 Jelly Bean,引入了有限的在TextView和EditText支持RTL和LTR混合的双向文本的支持.
- 从Android 4.2 开始,提供了全面的本地布局支持,允许镜像布局,可以同时支持RTL和LTR.
##如何支持RTL
###快速应用RTL镜像布局
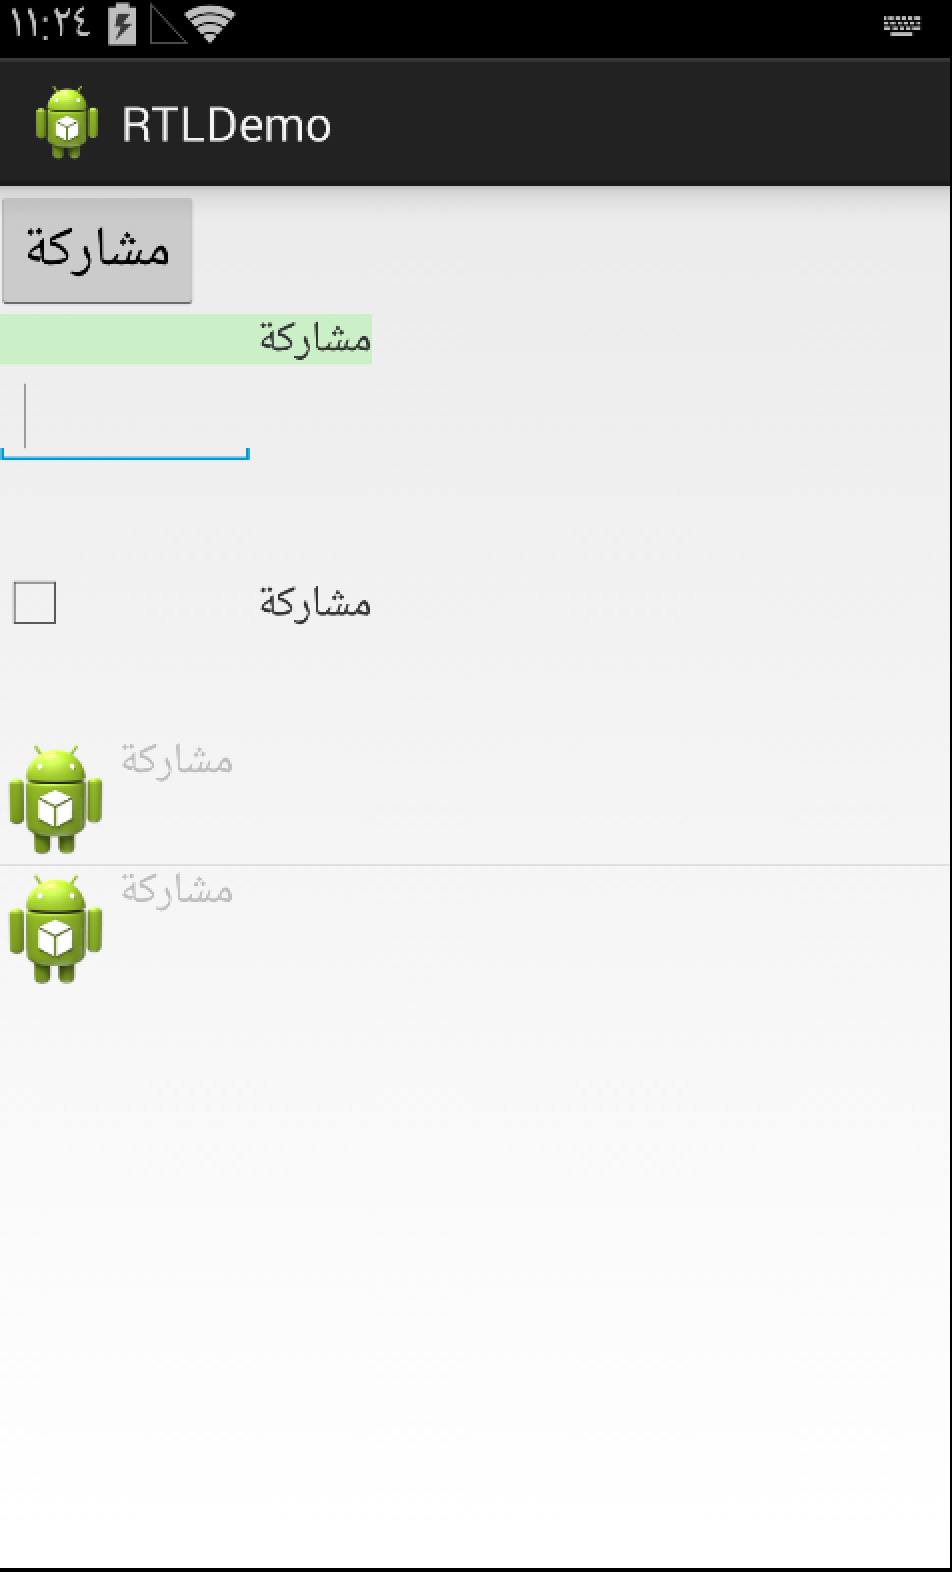
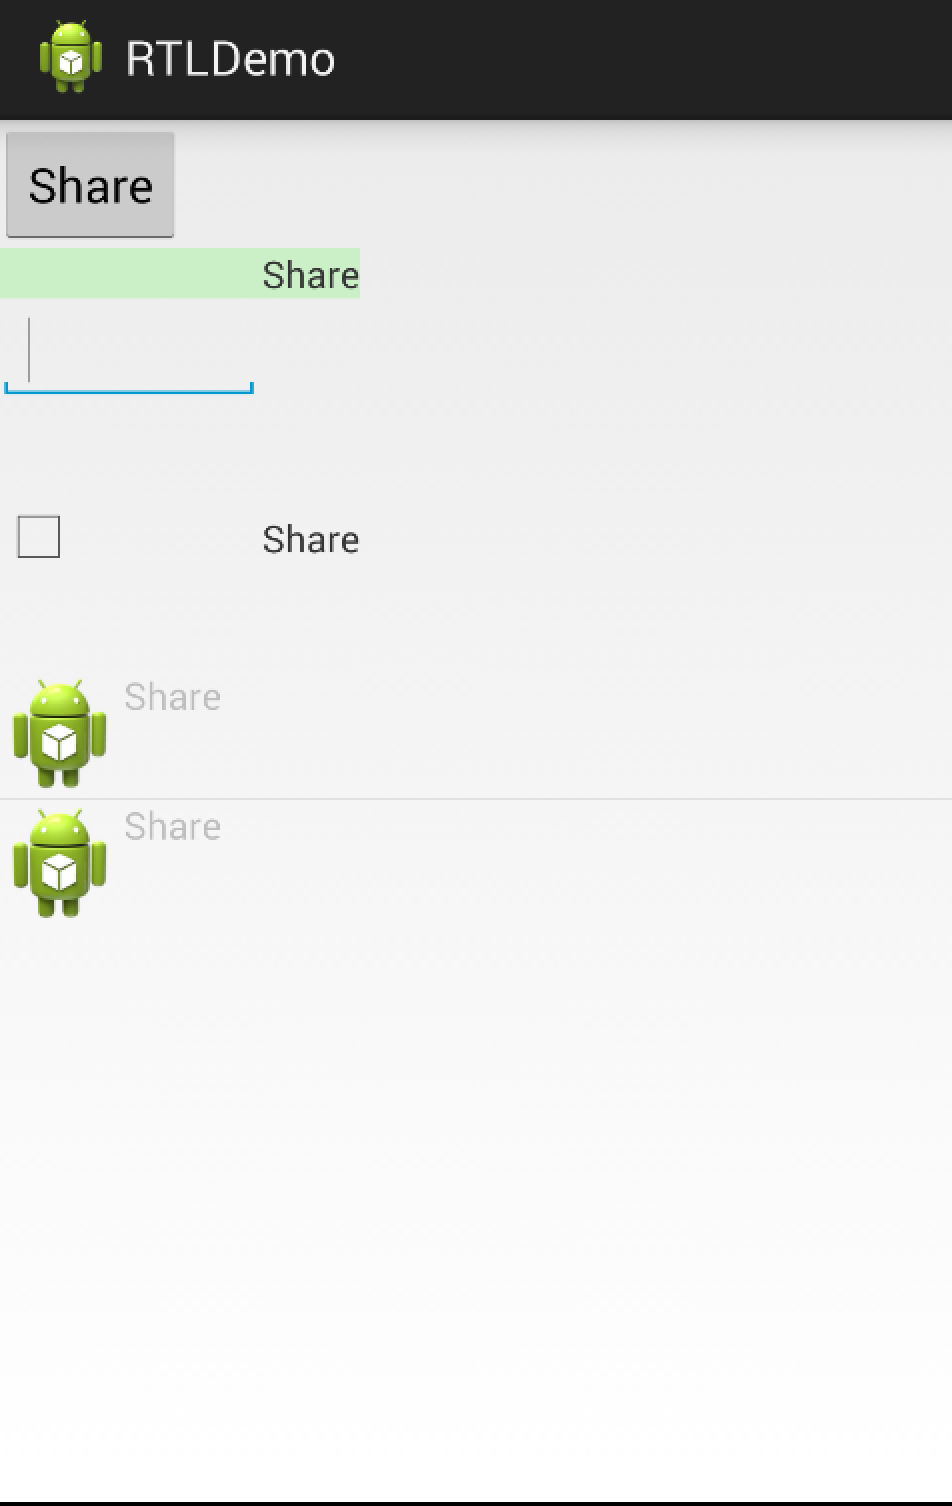
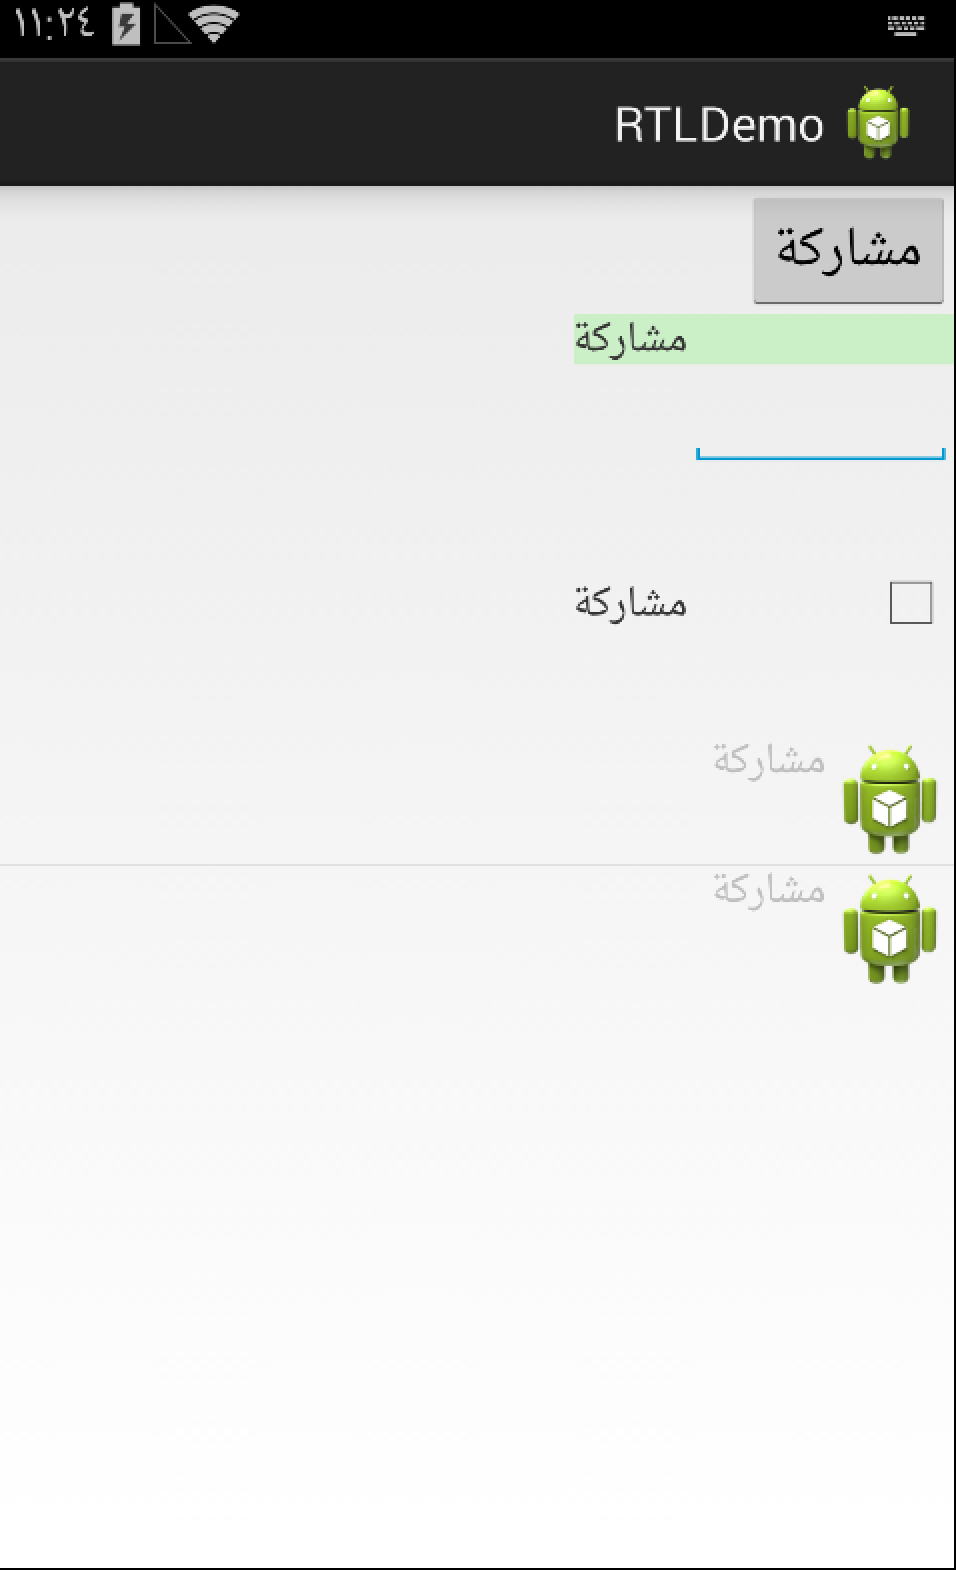
- 在manifest中的Application元素加入android:supportsRtl=”true”这个属性.
未加入android:supportsRtl=”true” 阿拉伯语(RTL)的示例.
加入该属性的英文(LTR)语言效果.
加入该属性的阿拉伯语(RTL)语言效果.
- 将所有的左右(left/right)布局属性替换成开始结束(start/end)属性.
如下述代码,使用paddingLeft
1
2
3
4
5
6
7
8
| <TextView
android:layout_width="wrap_content"
android:layout_height="wrap_content"
android:id="@+id/tvOne"
android:paddingLeft="100dp"
android:background="#ccefc8"
android:text="@string/share"
/>
|
阿拉伯语下的效果图为
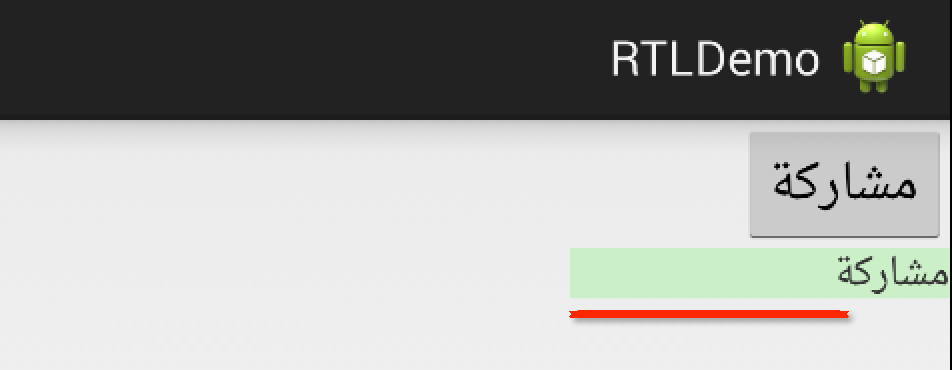 如上面所说,RTL语言是以右作为开始,所以paddingLeft明显不符合规则.
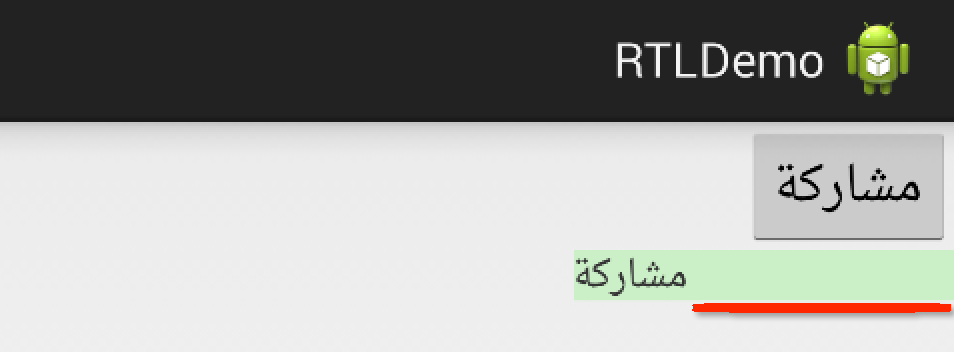
那我们使用paddingStart看一下.
如上面所说,RTL语言是以右作为开始,所以paddingLeft明显不符合规则.
那我们使用paddingStart看一下.
1
2
3
4
5
6
7
8
| <TextView
android:layout_width="wrap_content"
android:layout_height="wrap_content"
android:id="@+id/tvOne"
android:paddingStart="100dp"
android:background="#ccefc8"
android:text="@string/share"
/>
|
上述代码在阿拉伯语下的效果图:
##高级处理
- android:layoutDirection 设置组件的布局方向
- android:textDirection 设置组件文字的方向
- android:textAlignment 设置组件文字的对齐
- getLayoutDirectionFromLocale() 获取指定Locale的方向
- 创建单独的资源文件夹,以’ldrtl’(layout direction right-to-left)为后缀.如layout_ldrtl
- 使用Hierarchy Viewer来查看View的start/end属性,layoutDirection,textDirection,textAlignment属性.
##贴代码
###manifest
1
2
3
4
5
6
7
8
9
10
11
12
13
14
15
16
17
18
19
20
21
22
23
24
25
| <manifest xmlns:android="http://schemas.android.com/apk/res/android"
package="com.example.rtldemo"
android:versionCode="1"
android:versionName="1.0" >
<uses-sdk
android:minSdkVersion="8"
android:targetSdkVersion="19" />
<application
android:allowBackup="true"
android:icon="@drawable/ic_launcher"
android:label="@string/app_name"
android:theme="@style/AppTheme"
android:supportsRtl="true"
>
<activity android:name=".MainActivity">
<intent-filter>
<action android:name="android.intent.action.MAIN" />
<category android:name="android.intent.category.LAUNCHER" />
<category android:name="android.intent.category.MULTIWINDOW_LAUNCHER" />
</intent-filter>
</activity>
</application>
</manifest>
|
###MainActivity.java
1
2
3
4
5
6
7
8
9
10
11
12
13
14
15
16
17
18
19
20
21
22
23
24
25
26
27
28
29
30
31
32
33
34
35
36
37
38
39
40
41
42
43
44
45
46
47
48
49
50
51
52
53
54
55
56
57
58
59
60
61
62
63
64
65
66
67
68
| package com.example.rtldemo;
import java.util.ArrayList;
import java.util.Locale;
import android.annotation.SuppressLint;
import android.app.Activity;
import android.os.Bundle;
import android.text.TextUtils;
import android.util.Log;
import android.view.LayoutInflater;
import android.view.View;
import android.view.ViewGroup;
import android.widget.BaseAdapter;
import android.widget.ImageView;
import android.widget.ListView;
import android.widget.TextView;
public class MainActivity extends Activity {
private static final String LOGTAG = "MainActivity";
@SuppressLint("NewApi")
@Override
protected void onCreate(Bundle savedInstanceState) {
super.onCreate(savedInstanceState);
setContentView(R.layout.main_layout);
ListView listView = (ListView)findViewById(R.id.lvOne);
int layoutDirection = TextUtils.getLayoutDirectionFromLocale(Locale.getDefault());
Log.i(LOGTAG, "onCreate layoutDirection=" + layoutDirection);
TestAdapter adapter = new TestAdapter();
adapter.mData.add(getResources().getString(R.string.share));
adapter.mData.add(getResources().getString(R.string.share));
listView.setAdapter(adapter);
}
class TestAdapter extends BaseAdapter {
ArrayList<String> mData = new ArrayList<String>();
@Override
public int getCount() {
return mData.size();
}
@Override
public String getItem(int position) {
return mData.get(position);
}
@Override
public long getItemId(int position) {
return position;
}
@Override
public View getView(int position, View convertView, ViewGroup parent) {
View view = null;
view = LayoutInflater.from(getApplicationContext()).inflate(R.layout.listview_item, null);
ImageView imgView = (ImageView)view.findViewById(R.id.itemImageView);
imgView.setImageResource(R.drawable.ic_launcher);
TextView textView = (TextView)view.findViewById(R.id.itemTextView);
textView.setText(mData.get(position));
return view;
}
}
}
|
###main_layout.xml
1
2
3
4
5
6
7
8
9
10
11
12
13
14
15
16
17
18
19
20
21
22
23
24
25
26
27
28
29
30
31
32
33
34
35
36
37
38
39
40
41
42
43
44
45
46
47
48
49
50
51
52
| <?xml version="1.0" encoding="utf-8"?>
<LinearLayout xmlns:android="http://schemas.android.com/apk/res/android"
android:layout_width="match_parent"
android:layout_height="match_parent"
android:orientation="vertical" >
<Button
android:id="@+id/btnOne"
android:layout_width="wrap_content"
android:layout_height="wrap_content"
android:text="@string/share"
/>
<TextView
	    android:layout_width="wrap_content"
	    android:layout_height="wrap_content"
	    android:id="@+id/tvOne"
	    android:paddingStart="100dp"
	    android:background="#ccefc8"
	    android:text="@string/share"
	    />
<EditText
android:id="@+id/etOne"
android:layout_width="100dp"
android:layout_height="wrap_content"
/>
<LinearLayout
android:layout_width="match_parent"
android:layout_height="wrap_content"
android:orientation="horizontal"
>
<CheckBox
android:layout_width="100dp"
android:layout_height="100dp"
/>
<TextView
android:layout_width="wrap_content"
android:layout_height="100dp"
android:text="@string/share"
/>
</LinearLayout>
<ListView
android:id="@+id/lvOne"
android:layout_width="match_parent"
android:layout_height="wrap_content"
></ListView>
</LinearLayout>
|
###listview_item.xml
1
2
3
4
5
6
7
8
9
10
11
12
13
14
15
16
17
18
| <?xml version="1.0" encoding="utf-8"?>
<LinearLayout xmlns:android="http://schemas.android.com/apk/res/android"
android:layout_width="match_parent"
android:layout_height="match_parent"
android:orientation="horizontal" >
<ImageView
android:id="@+id/itemImageView"
android:layout_width="wrap_content"
android:layout_height="wrap_content"
/>
<TextView
android:id="@+id/itemTextView"
android:layout_width="wrap_content"
android:layout_height="wrap_content"
/>
</LinearLayout>
|
##Demo下载
- http://pan.baidu.com/s/1eQvL0MA
##延伸阅读
- http://android-developers.blogspot.hk/2013/03/native-rtl-support-in-android-42.html
- RTL语言:http://en.wikipedia.org/wiki/Right-to-left
##推荐